dollhouse 3.0: the one that took over my dining room
This dollhouse was my third renovation in the dollhouse series, and it came to me in the best way possible—by surprise. I had just finished renovating a vintage dollhouse for someone, and before they came to pick it up, they casually offered me their old one.
“Just a heads-up, it’s big,” they said.
Big? I laughed. How big could it really be?
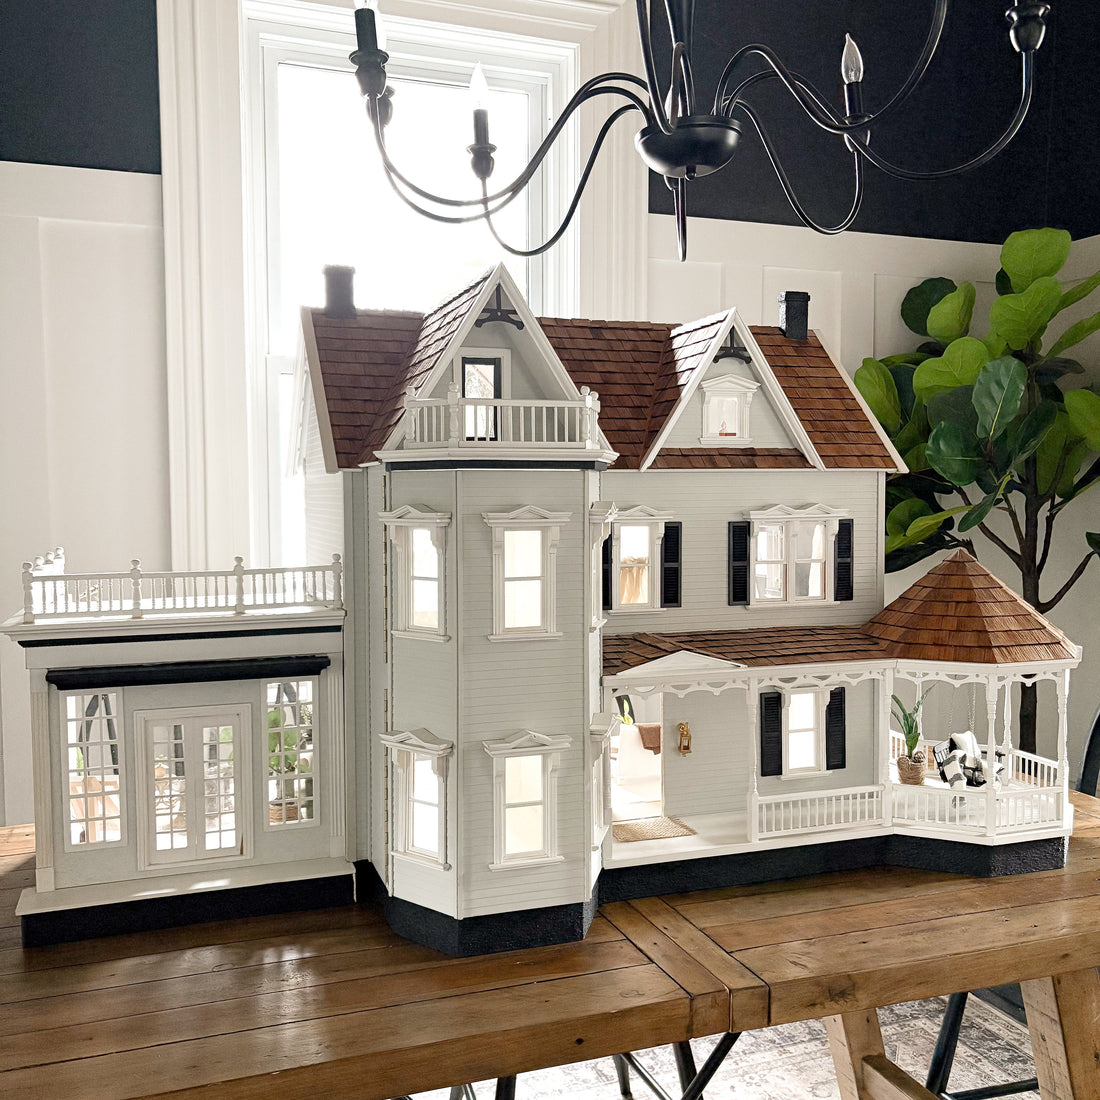
Cue me standing in my dining room, staring at a 55-inch-wide dollhouse with a full solarium attached. It completely took over my entire dining table, and I actually laughed out loud at the sight of it.
At first, I was super intimidated. Inside, it was nothing but bare plywood—unfinished walls, no floors, no paint, no furniture, no accessories. Basically, it needed everything.
I started strong, but… yeah. I lost steam. It ended up living in my bedroom walk-in closet for a year and a half, collecting dust and giving me a guilt trip every time I saw it. My logic was, “If it’s in my closet, maybe I’ll work on it at night while the kids fall asleep.” Spoiler: I did not.

the restart
A few months ago, I decided it was time to do this giant house justice. I hauled it back downstairs (goodbye, dining room table again) and dove in.
I started by painting all the walls Sherwin-Williams Extra White—clean slate, fresh start. For the floors, I used peel-and-stick shelf liner in a light birch wood tone, mounted on cardstock for structure. For the solarium and entryway, I scored a dollar store roll of thicker plastic shelf liner that looked like tiny mosaic stone—perfect scale, way easier to install, and my new favorite find for dollhouses.
Lucky me, I also had a stash of vintage dollhouse furniture, including a box of solid brass pieces. That gave me a great mix of vintage and handmade.
custom furniture & popsicle stick regret
For a view larger pieces such as a sectional couch and beds, I didn’t have the right pieces in my vintage furniture stash. I decided to try the adorable popsicle stick method I’ve seen all over my Pinterest. Big mistake.
I even bought a handheld snipping tool for it, but wow — cutting those big sticks was not fun. I gave up and headed to my workshop, where I started making furniture from scrap wood instead.
Best decision ever. I made a sectional couch in no time, and it turned out amazing. From now on, I’m a “custom workshop furniture” girl, not a “popsicle stick warrior.”

accessorizing & embracing imperfections
For rugs, I raided my fabric stash and cut simple squares, letting the edges fray, and calling it good. I wasn’t as obsessed with perfection as I’d been on my first two dollhouses. This one embraced a little more “dollhouse charm” rather than trying to look like a perfect miniature of a real home.
For wall art, I discovered the best hack ever. I printed all my tiny art photos on a sheet of foam core through Staples (I wasn’t even sure I was ordering it right, but it worked!). I just had to cut them out with an X-Acto knife—no mounting required—and framed them with popsicle sticks. The glossy finish made them look like they had glass in them. Definitely doing that again.

the solarium: my favourite room
The solarium sticking out of the side was dreamy, so it had to be special. I polled Instagram: reading nook, greenhouse, potting studio, or art studio? The vote was split, so naturally, I did all three.
I made a tiny potting bench from popsicle sticks, tucked a mini easel into the corner, and placed a vintage ceramic chair with a side table for reading. Then I spent an entire afternoon making miniature plants, which might have been the most satisfying part of the whole project.

Plant hack: use a bead glued to a button for a flowerpot with a sturdy base, then add fake greenery snipped into tiny pieces. I also made mini indoor trees using (you’ll love this) Tylenol cups. Wrapped in jute, filled with clay, stuck in a branch from outside, topped with moss—voilà, instant chic dollhouse trees.
Hands down, those details made the house come alive.
time to sell (and say goodbye)
Eventually, I realized the house was basically done… but I still had about 50 ideas left in my head. At some point, you have to call it finished.
I took photos, posted sneak peeks on Instagram, listed it on Facebook Marketplace, and it sold in a few days. The buyer said she felt like she “won the lottery” finding it. That’s the best feeling.
People always ask if I’m sad to sell them, but honestly? Not even a little. The fun for me is in the making, not the keeping. None of us were going to play with it, so it feels amazing to see it go to someone who’s excited about it.
will there be a fourth dollhouse?
Right now, I want to say no (which I also said after the first two). But… I do have an unloved dollhouse upstairs in my kids’ room that I might “adopt” if they’re over it. Plus, thanks to the algorithm, dollhouses keep popping up in my Facebook Marketplace feed.
So… we’ll see.
For now, this one was pure fun, a great creative break, and I loved sharing it with you. Thanks for following along with my little dollhouse obsession!
Until next time,
Lisa

